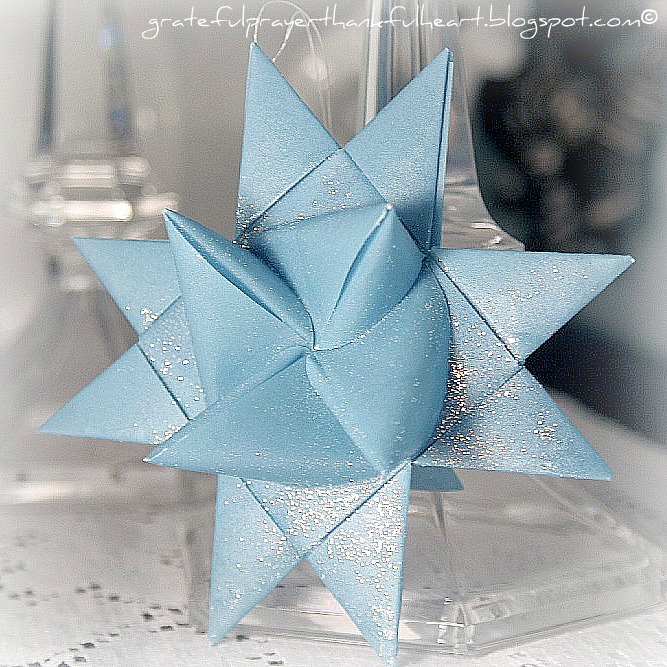
Do you recognize these folded paper German stars? Many folks remember making them as a child or seeing relatives make them. You might even have one or two from long ago. Would you like to learn to make them? Follow my video tutorial and I’ll walk you through the many steps one fold at a time.


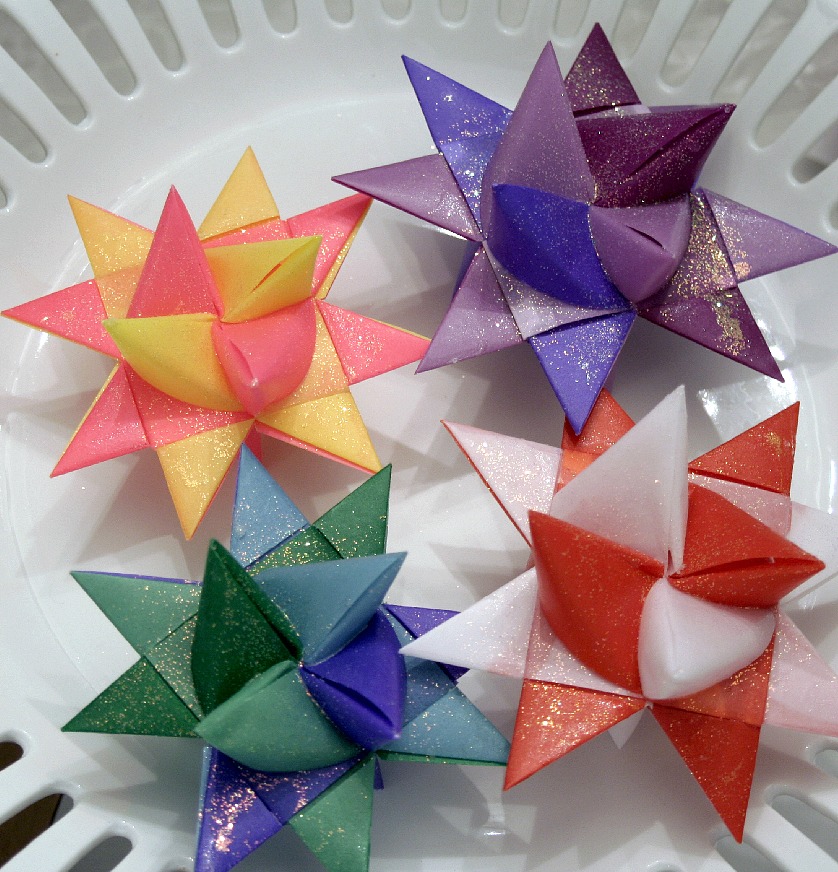
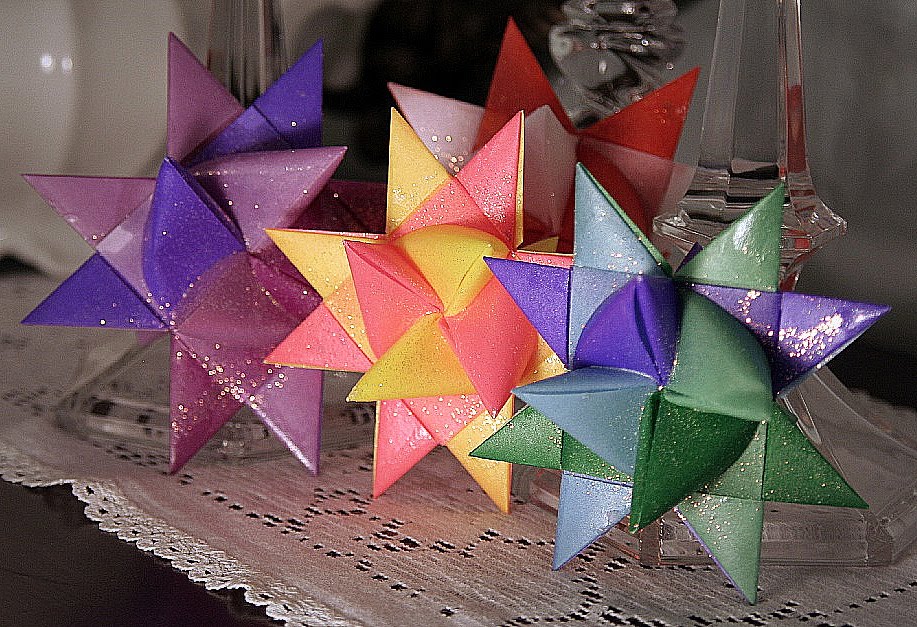
They are very pretty in bright colors too. These remind me of a quilt pattern.
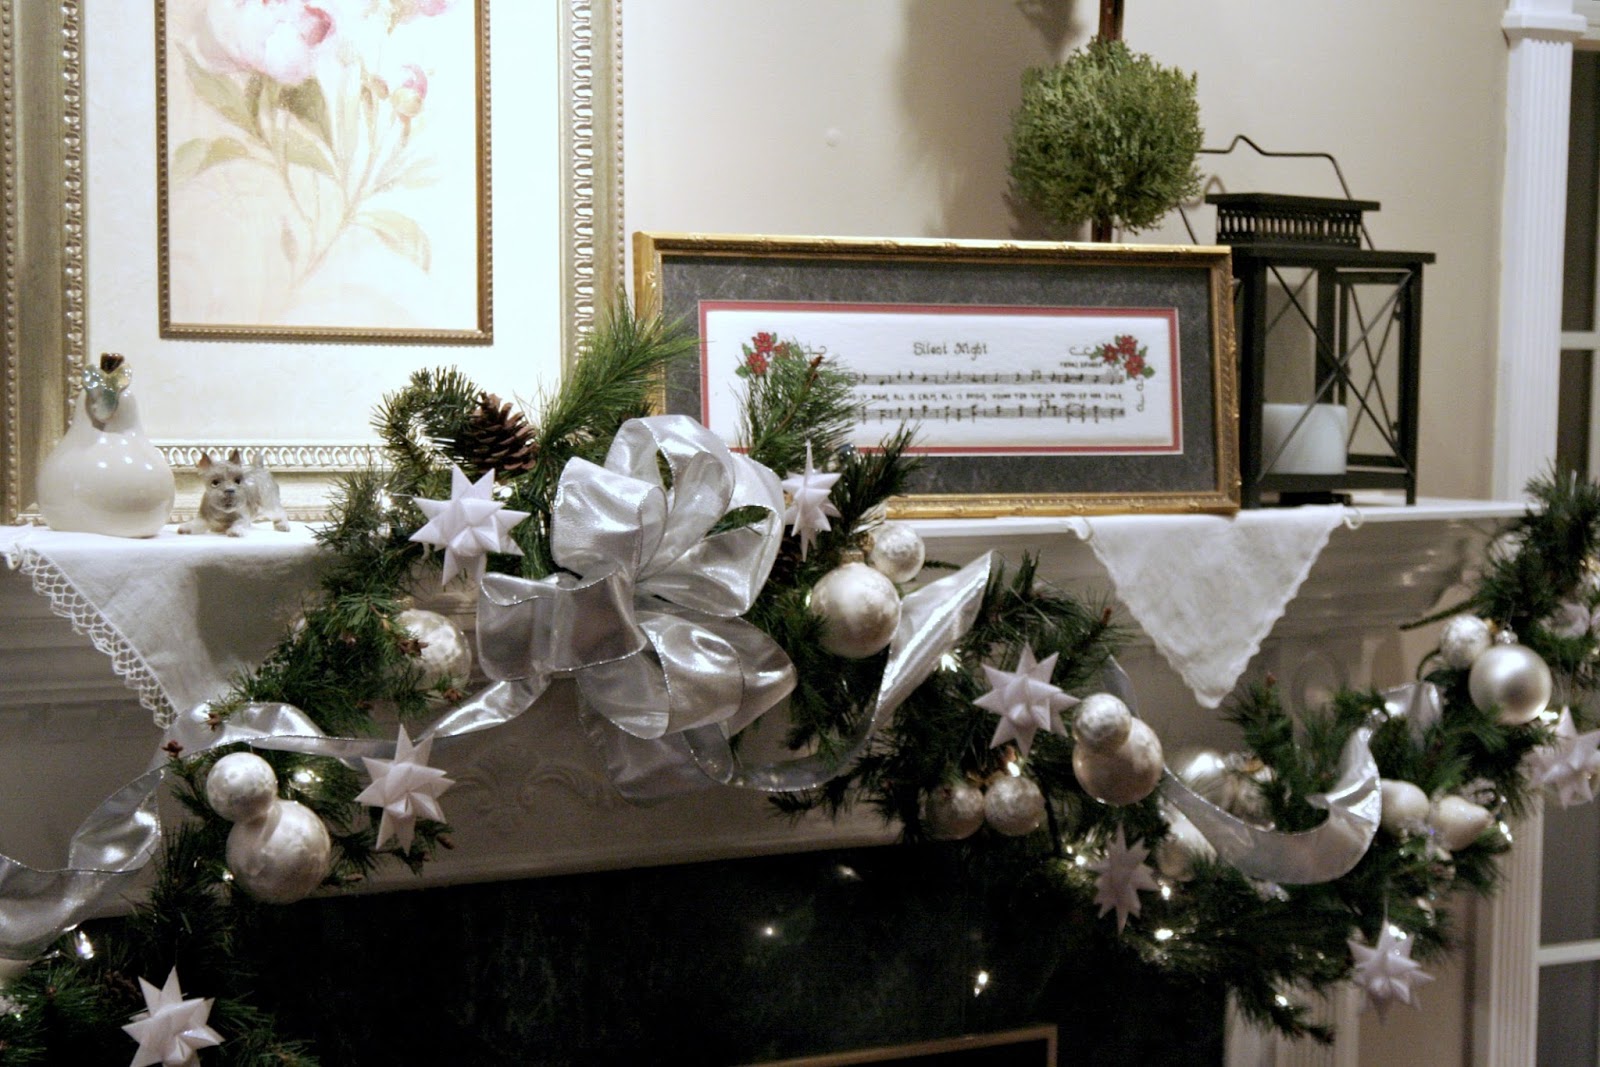
Make some stars in pretty colors and package up as thoughtful gifts.

Use as a thank-you gift or hostess gift.
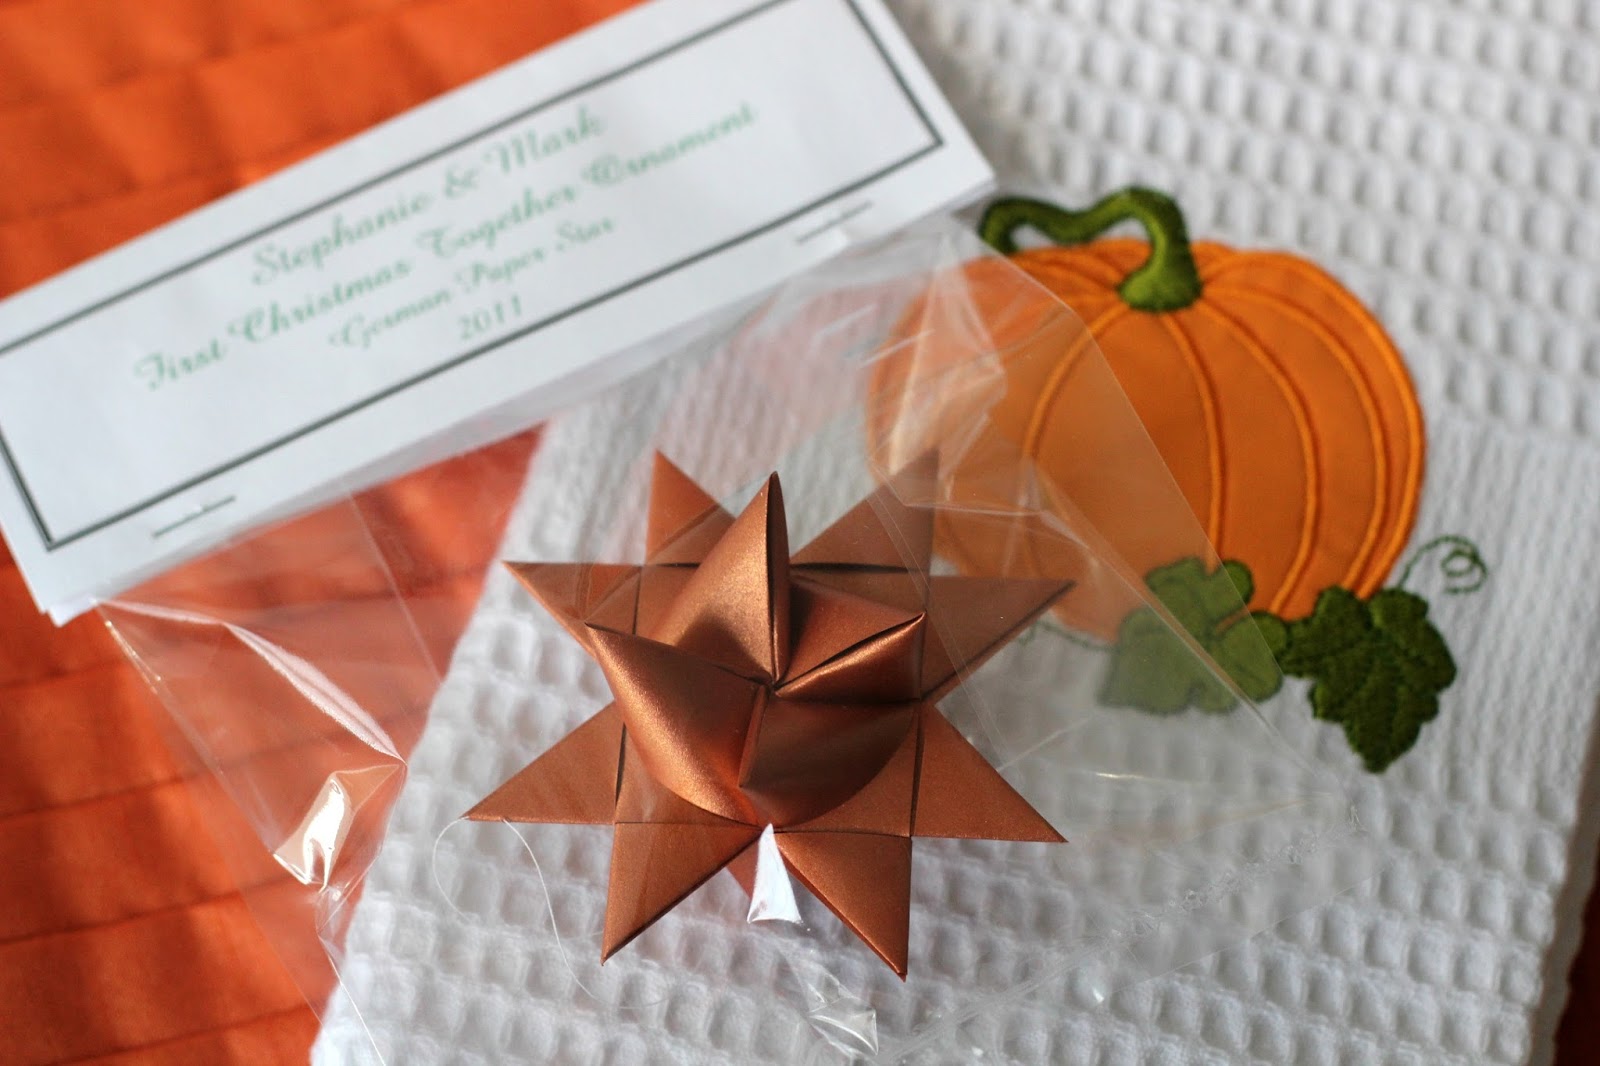
Use as a package bow, a shower favor or give as a 1st Christmas Together ornament.
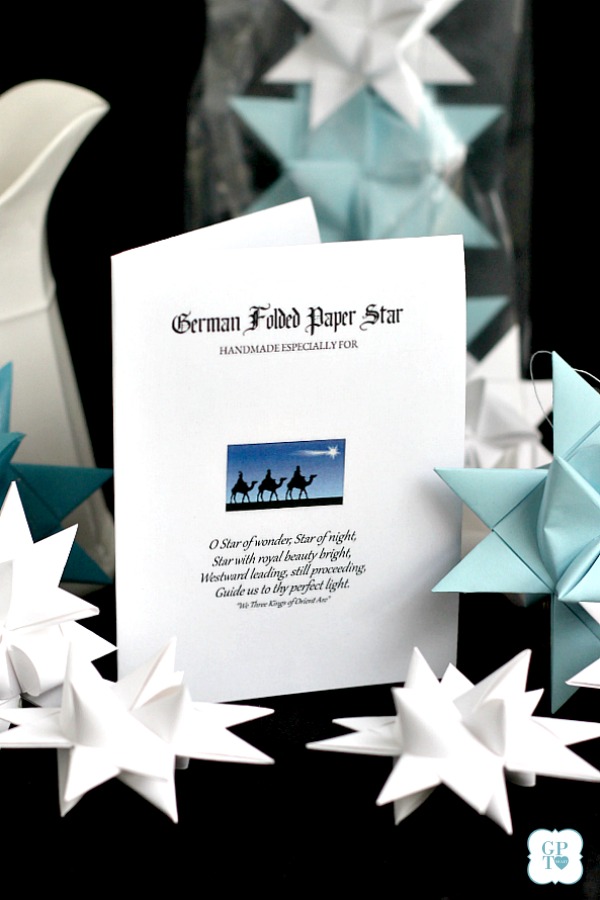
If you are giving stars as gifts, you might want to include a card. I created a FREE printable for you with a place for the recipient’s name on the front, a little history about the stars on the inside and storage suggestions on the back. Get your printable by clicking German Folded Paper Stars Gift Card.

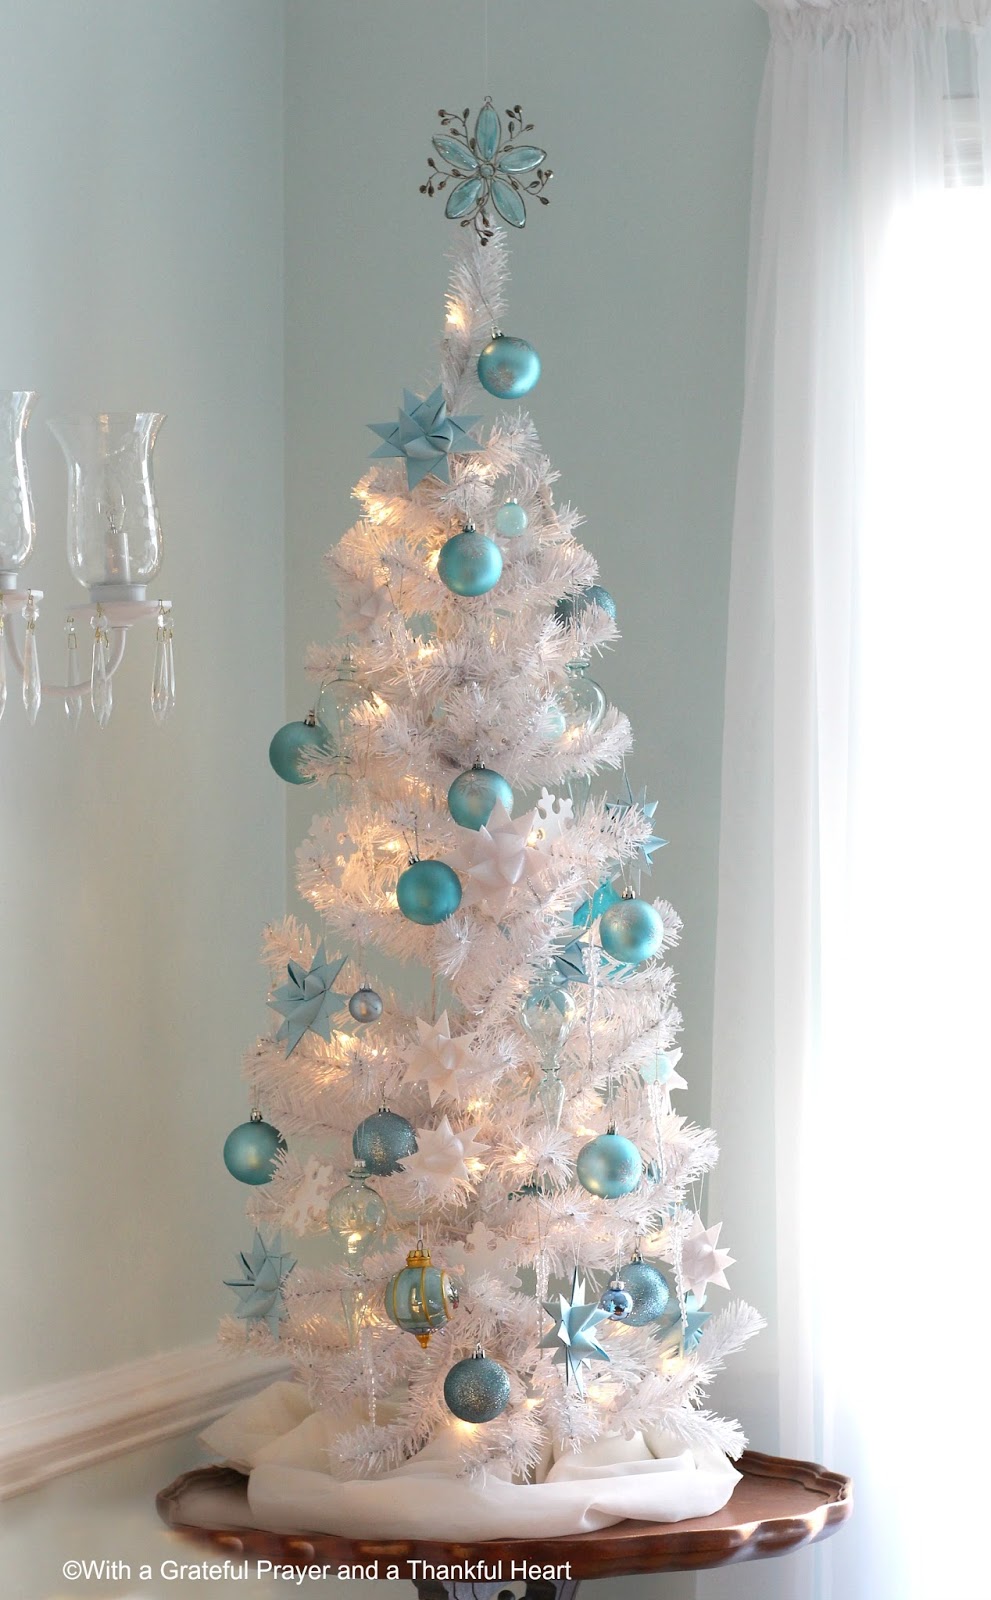
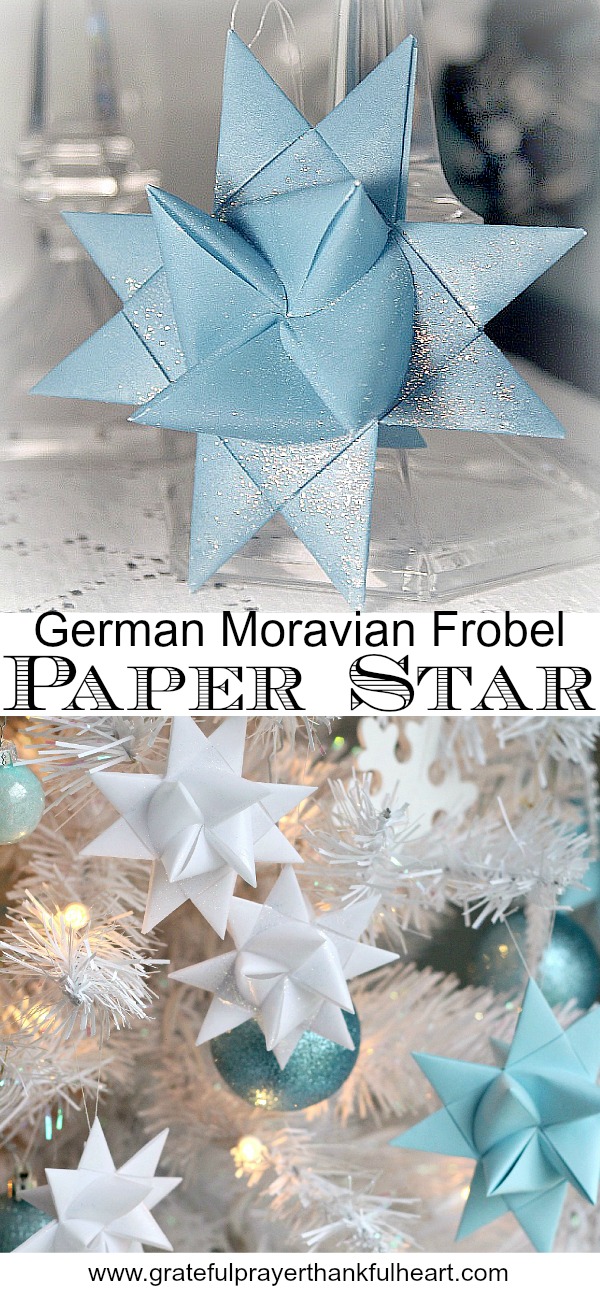
Stars in just blue and white adorn this tree. The white stars are waxed and the blue ones are not.
German Star Video Tutorial for Making Stars
Part 1
Part 2
Dipping German Stars in Wax
 Traditionally these German Stars were dipped in paraffin to help protect them from the outdoor elements. I displayed some on a tree on my porch and they suffered no ill effect.
You can find the How-To process by clicking Dipping German Stars in Wax.
Where to find paper strips to make these lovely stars on Amazon.

FREE gift for subscribers!
If you enjoyed this post, you’ll love my email. Subscribe to have updates delivered to your inbox (about every three weeks) and receive FREE gifts available exclusively for subscribers. Don’t miss new content with recipes and ideas to inspire & encourage you. We would love for you to join our community. Just click the subscribe button below.

These are amazing little stars!! Very elegant and difficult looking but actually fairly simple . Especially with this excellent tutorial. Very watcher friendly! Thank you so much!
Hi Audrey,
Thank you so much for your comment 🙂 Aren’t the stars so fun to make? My goal was to make the video super easy to follow so folks can have great success.
Appreciate your visit and taking the time to leave a comment!
Kindly, Lorraine
Thank you for sharing your tutorial. I have enjoyed making these!!! Pretty!
The first thing is to listen to the meaning of the article and the purpose of which here is very attractive thanks admin jaket kulit pria
Great tutorial was able to get the 3D points because of it.
This is a wonderful tutorial. Thank you so much for your clear instructions and beautiful stars!
Thank you so much for your excellent video tutorial. I recently made 50 of these as christmas gifts for my daughter's classmates. They were a big hit.
I blogged about it on Random Crafting Adventures
Thank you so much for your excellent video tutorial. I recently made 50 of these as christmas gifts for my daughter's classmates. They were a big hit.
I blogged about it on Random Crafting Adventures
I found your blog via betzwhite.com.
I remember having a star like this on our Christmas tree when I was a kid, but I don't know who made it or where it came from. I was always intrigued by it.
Thank you for the video tutorial and explaining and showing it ALL step by step.
I do have one question I did not see answered. Does the length of strip vary with the width of the strip or is it always 25 inches long?
I have been making these stars since I was a young girl. We used to make them for Christmas and sell them door to door to the neighbors…They would order dozens….I noticed some inquiries about where to purchase the paper..This is where I ordered mine the last time…https://www.highhopes.com/3dstar.html
I also noticed on the tutorial about dipping them in the wax…We used a coffee can it worked great..That way the stars get a covered easily…We would used thread back then..Now I use a pretty thin ribbon or metallic cord..Dip them then lay them on NewsPaper and glitter….I hope this is some help to someone..I have wonderful memories of making these as a child for Christmas money for my gifts to Mom and Dad…
Just have to mention that these stars aren't exclusively German. My dad grew up in Danmark, and stars like these were (and are) traditional among Danish families. We make them whenever our stock gets low, but we've never used tape or wax or anything like that. And my favorite are the white, I agree, quite pristine! 🙂
OK, I have to try these. I made Polish Porcupine Balls a couple of years ago.
The star is beautiful and the videos are perfect!!!! (from Buenos Aires, Argentina).
Many years ago my aunt made dozens of these. I love them! The wax kept them nice for many years.
Hi!
Thank you! Guiding us through these steps made our Sunday afternoon wonderful. My kids loved making these stars.
Greetings from Hungary – Andrea
Thank you so much for the tutorial,it is so easy to follow. And your stars are beautifull.
I˝m making them right now and in love with them:)
Realise that this is a super late comment to your post but I just found it while looking for German stars. I love your tutorials – have you thought about using quilling papers. They are very thin but I have found them in a variety of widths and they work brilliantly for the Japanese stars and other paper crafts that I have tried.
Cheryl ~ I have not used scrapbook paper so I am not sure. I wonder if the thickness might be a little hard to work with but you can give it a try. I have used tiny pieces of tape with success to make longer strips of paper. I did not overlap them because I think a bulge would not slide easily through the folds.
can you use scrapbooking paper and can you glue the strips together with a glue sticks?
You know I've had 3 Christmases here in Germany and I never knew what those stars are called, I can't wait to try this for our last Christmas here, good thing I'm seeing it in February – I'm not the most talented crafter!
I read about your tutorial on another blog. How fabulous it is!
LOVED trying this out, and the instructions are so clear, I could follow with just a few pauses.
Thank you!
I am thrilled to have found this website! I was searching for German star instructions…my friend's Mom made these when I was a child (I am 63)and I have had them in my memory all these years. I had another set of instructions which did not have a video;yours are the best! God Bless you and your beautiful family…I also have 4 children and 9 grandchildren. The interests you describe sound like me!
This tutorial is brilliant, thank you very much!!!! Tremendously enjoyed making stars! :)))))
Thank you for such a well laid out tutorial! I love learning how to decorate in traditional ways, and recycle at the same time (I used magazine pages). These look lovely and the fact that they are a German family ritual blesses me as I use them to style up my place for Christmas.
Hello,This year I decided to do a antique/vintage tree in my home.I unpacked the ornaments and WOW there was a German Star that I had made in my youth. My German grandmother had taught me how to make these stars.I tried as I may but I could not remember how Grandma helped me those many years ago,(60) to be exact. When I found your website I got very excited and atonce started cutting strips of paper. It only took viewing you video once and I was turning out new stars for my holiday decor. When I tried my first one I used "Junk Mail grorcery adds. The end effect looked like the stars were made from confetti. Once again for a fantastic
Muchas gracias, muy lindo video
Like so many here, thanks for the well done tutorial. Written directions are so confusing, and your video puts things into perspective. Size, pace and well given step-by-step directions were very clear!
I use this make these stars at elementary school but I forgot how to make them.
So thank you for making this tutorial, it was very helpful.
Thank you for the tutorials! I was born in Norway and these stars are what my parents decorated our Christmas trees with for the first few years. (They were teachers in an American school so there was ample paper, but not much else). I can't wait to try to make a few of these for my tree this year. Thanks so much!
Thank you very much for take the time to do this tutorial, the stars are very very beautiful, congrats!
regards from México
I just found your blog! I have received a star in a swap made from material and all the instructions I found were hard to understand. Your tutorial looks excellent! Will be a definite ornament for people this year. TFS!
Now, this is going to age me….but I made these in grade school…some 50 years ago. And, I've told my husband about them…never to be able to find the 'how' until now!!
You're a treasure!!
Thank you sooooooooooo much!!!
I had never heard of these German Stars until yesterday. I gave our school nurse a similar crafted star. She told me that her German grandfather made stars for their tree. Intrigued, I looked this up on the internet. Your tutorial was well done and easy to understand, plus, I could back up whenever I needed to. I used strips of paper from our huge rolls of paper at school. You can easily get any length you need without taping the end together. Thanks. Cassie
Dear Lucy.oh,
He usado Google para traducir tu comentario. Gracias por tus amables palabras! Envío de Feliz Año Nuevo deseos para usted en el Perú! Por favor visite de nuevo. Atentamente, LDH
Precioso la estrella los felicito he visto el video,no se las medidas pero voy a tratar de hacerlo(no sé inglés) GRACIAS POR COMPARTIR el tutorial les escribo desde Lima Perú.
y que reciban bonito el AÑO NUEVO 2010 un abrazo para toda tu familia.
An email received from Sue:
Hi,
I just saw your stars and tutorial on your blog. They are beautiful.
I have made the stars for gifts in the past using gift wrapping ribbon rather than paper. You can get so many colors and textures, as well as sizes. The iridescent ribbon is gorgeous but hard to see as you are working. i have never dipped them in paraffin- it does make them look nice.
I don't have a blog so wasn't able to add my comment to your post. You can add it for others to read if you like.
I would love to win a set- especially the white or multi-colors.
Merry Christmas
Sue
These are beautiful. I made these as a teenager, but forgot how. Thanks for the reminder!
Hmmm .. do you think these would work if they were made with starched strips of fabric?
Julie Andrea
sundayschild1966ATyahooDOTcom
I enjoyed the tutorial and I am anxious to try doing one of these. I think I like the blue ones best.
Mama Bear
I made these stars 15 years ago, but I used white ribbon instead of paper. I still hang them on the chandelier over our dining table every Christmas. The year that I made them, I made extras and when a guest commented on how beautiful the stars looked, I removed one and gave it to them as a gift. I was searching for instructions on how to make them again when I discovered your site. Thank you for refreshing my memory with your tutorial and the idea to use paper. May your Christmas be filled with joy and love!
I would love the white stars, they are so elegant. Thanks for the tutorial.
marshanba@yahoo.com
Thank you so much for sharing – these stars are lovely, I just made one from your very clear tutorial. They look so complicated and you make it so simple.
Please enter me in your folded star ornament giveaway. I don't know how I missed seeing this before now!
Thanks for mentioning mine on your blog!
Thank you so much for the video tutorials you created. They made it so easy to learn how to fold these stars. The stars are gorgeous and pretty easy to make once you get used to the steps. I've made about 10 in the last couple of days of varying sizes, colors, and papers. I'm making ornaments out of them to give to friends this Christmas.
I love "Walking in the Air" Thanks! My kids and I watched the British Snowman video this comes from..only about a million times, and that was only yesterday, wasn't it?? (my baby is a junior in college…)
And thanks for the refresher on these stars.
Happy Christmas! Suzanne
Love the stars – would love the white. I live in Lititz, PA and our town has a large Moravian church. Many homes have Moravian stars that they hang outside during the Christmas season that when lit at night are just beautiful. Love your site and look forward to your posts. Kim
kimlessig@yahoo.com
Hi,
I just found your site! I have always wanted to make the stars! Thanks for posting the tutorial. I would love the white or blue if I am that lucky. I am going to link to your lovely blog. I would love to read it all of the time. Have a blessed holiday! Bernadette
daveandbern1@verizon.net
Your blog is wonderful, I don't have a blog but love learning new things reading all of the wonderful ideas around. God Bless & Merry Christmas.
debbie s.
justvisiting10@aol.com
I really love this, thank you for taking the time to explain how to make these beautiful stars! Its hard to choose a favorite… but the blue are so pretty 🙂 iheartoranch (at) yahoo (dot) com
Hi:o]
I found your web blog thru WhipIt's newsletter and love it:) Especially enjoy the Scriptures you include:o) The stars are beautiful:) Not sure if I'll ever perfect them, but fun to try:] God bless you this Christmas season as we celebrate our Lord's birthday:) Have a blessed day in our Lord's house tomorrow<:o] Blessings, Sherrill <><
I would love the have the multi colored stars. In the mean time, I'll give it a try and fold some stars.
Patonslake
Lovely, I am from Germany and haven't seen these since leraving home.
Congratulations dear Mrs.H!
I would LOVE to enter your giveaway!!
Your blog has been a sweet-sweet blessing
in my life!!!! I praise God for you!
Love & Blessings~ Jen
Hello!
I saw your giveaway on my Auntie's blog…
I love your beautiful handiwork! I would choose the white stars… Also, I love your blog song, "Ancient Words". Thank you!
~Myranda
love_to_sing44@hotmail.com
This is the first time I have visited your blog. I have just started this journey – so congrats! on your 1 year anniversary. You star ornaments are truly beautiful – I have just become a follower and will post a link on my blog. I know this is a busy time of the year – but if you feel like stopping by and saying hi, please do so.
Blessings,
Jo
Thank you for sharing this I bookmarked this post when we get settled I would like to make some of these as decorations…..May the Lord bless you with many more years of Blogging and in Good Health ~Blessings Heather
Hi! I love these stars! I've always wanted to know how to make them. Came over here from OnePrettyThing, and love your blog! I'm now a follower too! (Still trying to figure all that out- new to the following process!)
If I won, I'd love to have the white set of stars. 🙂
beccas_song@yahoo dotcom
I clicked over here from One Pretty Thing & I'm sure that I'll be visiting you again! I like the dark purple/aubergine stars the best, but all are beautiful & I'll be trying to make them for myself, too. Thank you for the videos!
BettyC
I love these..love these…and of course I am a follower…and…will post this on the TOP of my sidebar for all to see…I hope I can figure this out…sitting is a bit hard..and the spirit is willing but the flesh is weak…
You are such a talented lady…
I would choose PINK…
Deby
btw..thanks for posting this *early*…such wisdom in doing that…!!!
What a blessing your blog has been to me! I'm so grateful I found you! Happy Anniversary and I hope you have many, many more. I would love the blue stars!!! But more importantly, I'm just glad to be a part of your blogging world!!! Enjoy your day!
CONGRATS! I think I am getting close to a year blogging myself. May have to do a giveaway soon myself.
The stars are lovely. I love all the colors, but the white is my favorite.
Have a blessed day!
Hugs…
tara
I love these stars. Thank you sooooo much for putting up the tutorial. Hopefully I can get a chance to make some. Where do you get paper that is 25 inches long? Craft store I am assuming?
I posted a link on my blog and of course I am already a follower. Love your blog!
That is so kind of you to share such a wonderful craft with us. I have always admired those kinds of paper stars and wondered how they were made. Now I know!
Of course I would love to enter your giveaway! The stars are gorgeous and you are so generous to give away so many! I love them all but I think the white ones are my most favorite! I am already a follower and I am putting your giveaway on my sidebar!
I really wanted to read the tutorial because I can't watch video on my computer (dial-up… it just doesn't work!) so I really hope I win! ;~}
Blessings!
O.K. it looks like I'm the first. That's what I get for being awake at this time of day.
I think I like the white stars best even though the other colors are fun as well.
I am already a follower. I like your blog a lot.
And, I have posted about your giveaway on my blog.
thank you.
Hey I just glanced over and realized that you have four daughters…so do I!