• Home
  • About
  • !!! SUBSCRIBE TO OUR NEWSLETTER – FREE GIFT !!!
  • Blog
  • Contact

Lorraine D. Hebler

  • Recipes
    • Appetizers
    • Beverages
    • Breads – Quick & Yeast
    • Breakfast & Brunch
    • Canning & Freezing
    • Entertaining
    • Holidays
    • Main Dishes
      • Beef
      • Chicken
      • Fish & Seafood
      • Pork
    • Pasta
    • Salads & Dressings
    • Soups & Stews
    • Sweet Treats
      • Biscotti
      • Cakes & Cupcakes
      • Cookies & Bars
      • Desserts
      • Muffins
      • Pies & Cobblers
      • Scones
    • Vegetables & Sides
    • Visit My Galleries
  • Crafts
    • Crochet
    • Knitting
    • More Crafts
    • Visit My Galleries
  • Faith
    • Faith Statement
    • Faith Printables
  • Home and Garden
    • Birds & Butterflies
    • Flowers Plants & Herbs
    • Home Decorating & DIY
  • Family
    • Family & Friends
    • Grandchildren
  • Resourses
    • Gift Guides
    • Photography Equipment
    • Food Styling Photo Props
    • Sock Hop Party Shopping Guide
  • Travel
  • Vintage

Three Projects using Heart Shaped Mold

By Lorraine

Heart shaped mold sugar cookie
 I purchased a Pampered Chef Cookie heart shaped mold at a garage sale a few years ago and am just now getting around to trying it out. I made pretty sugar cookies.

 heart shaped mold sugar cookie

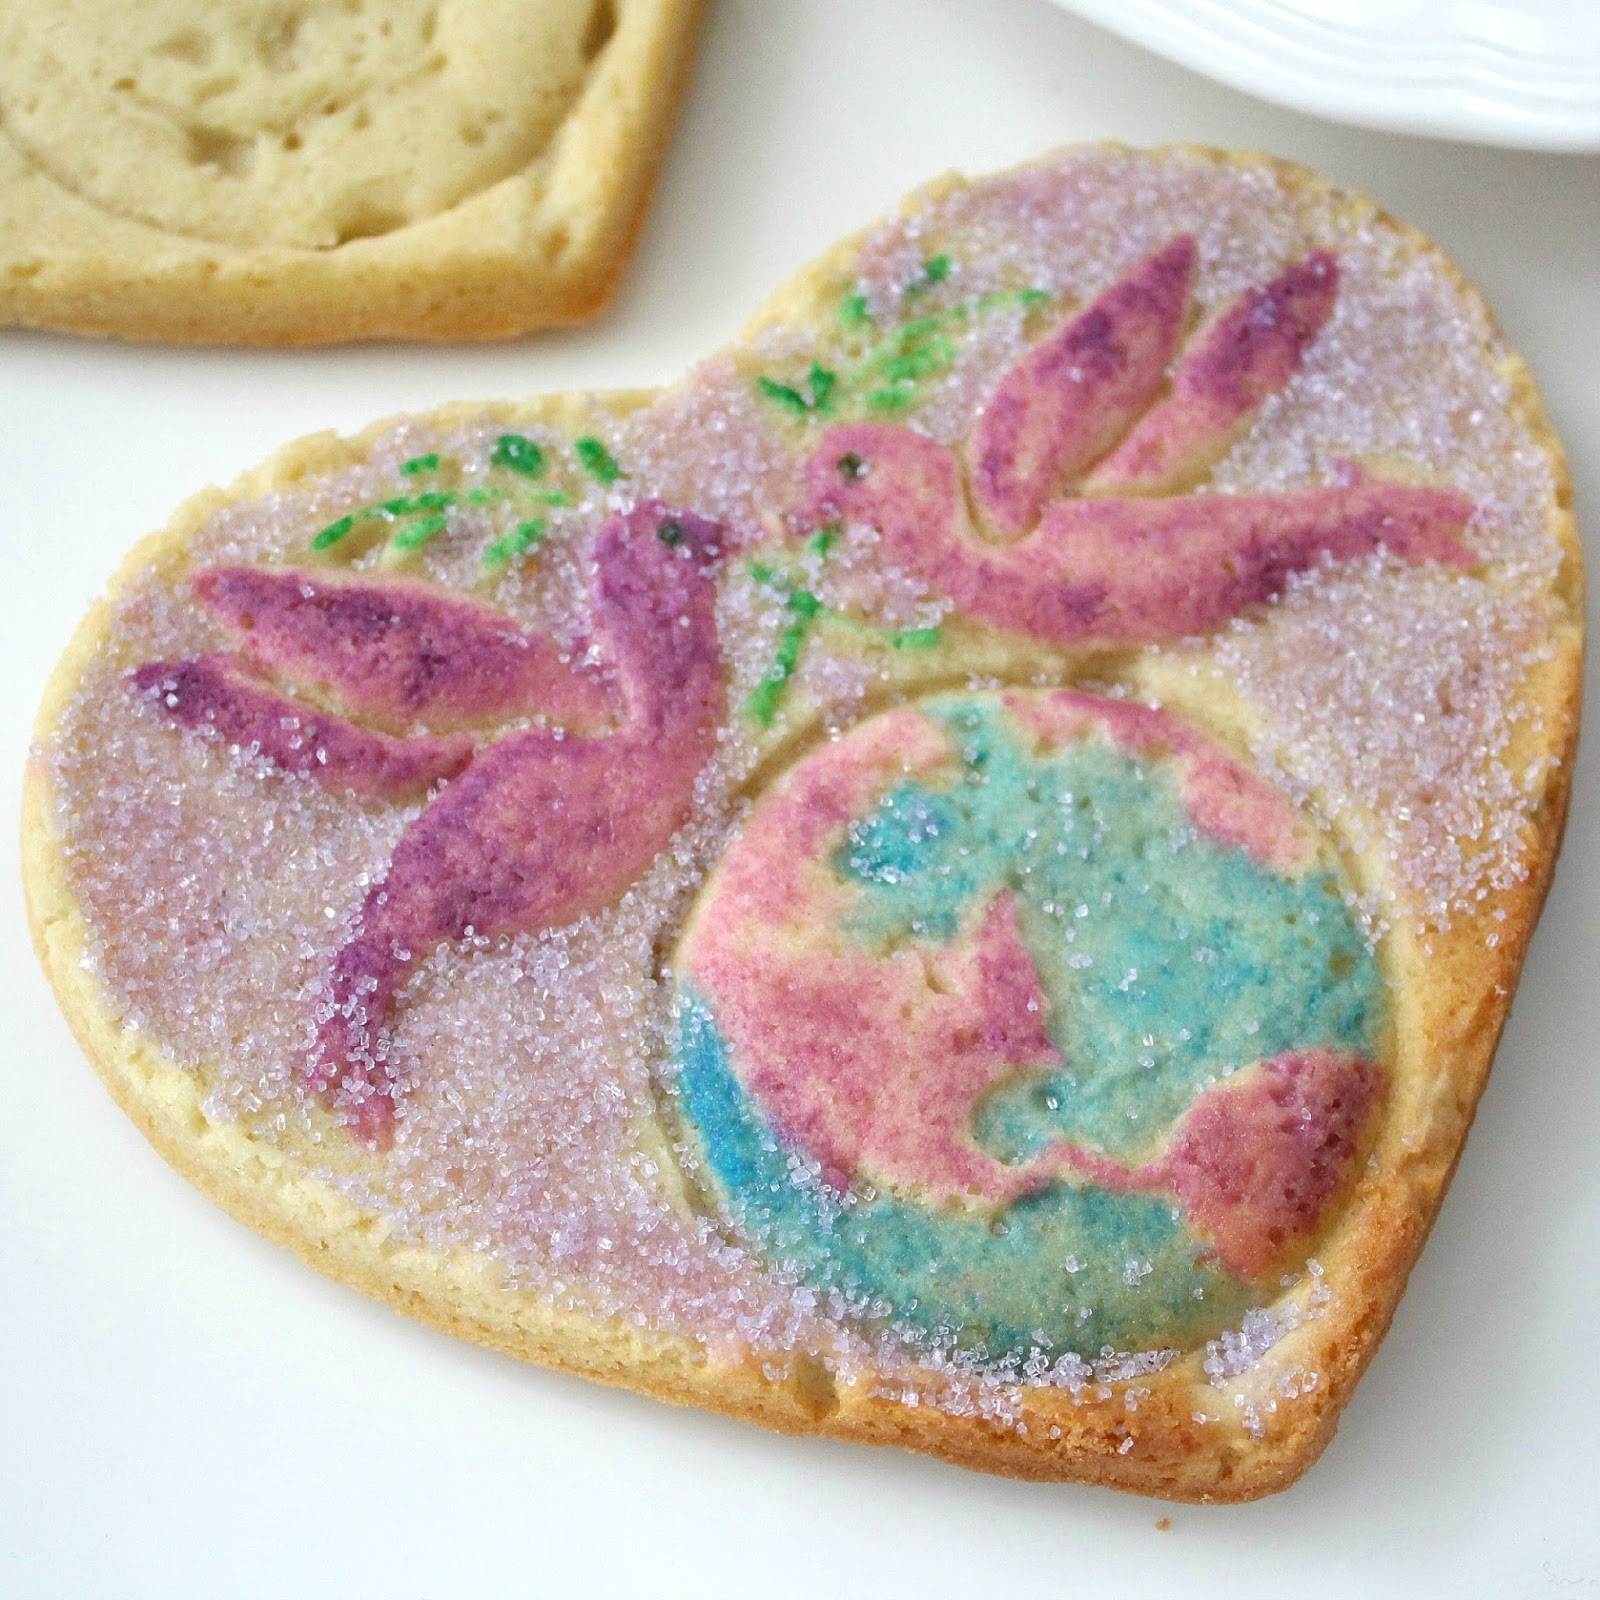
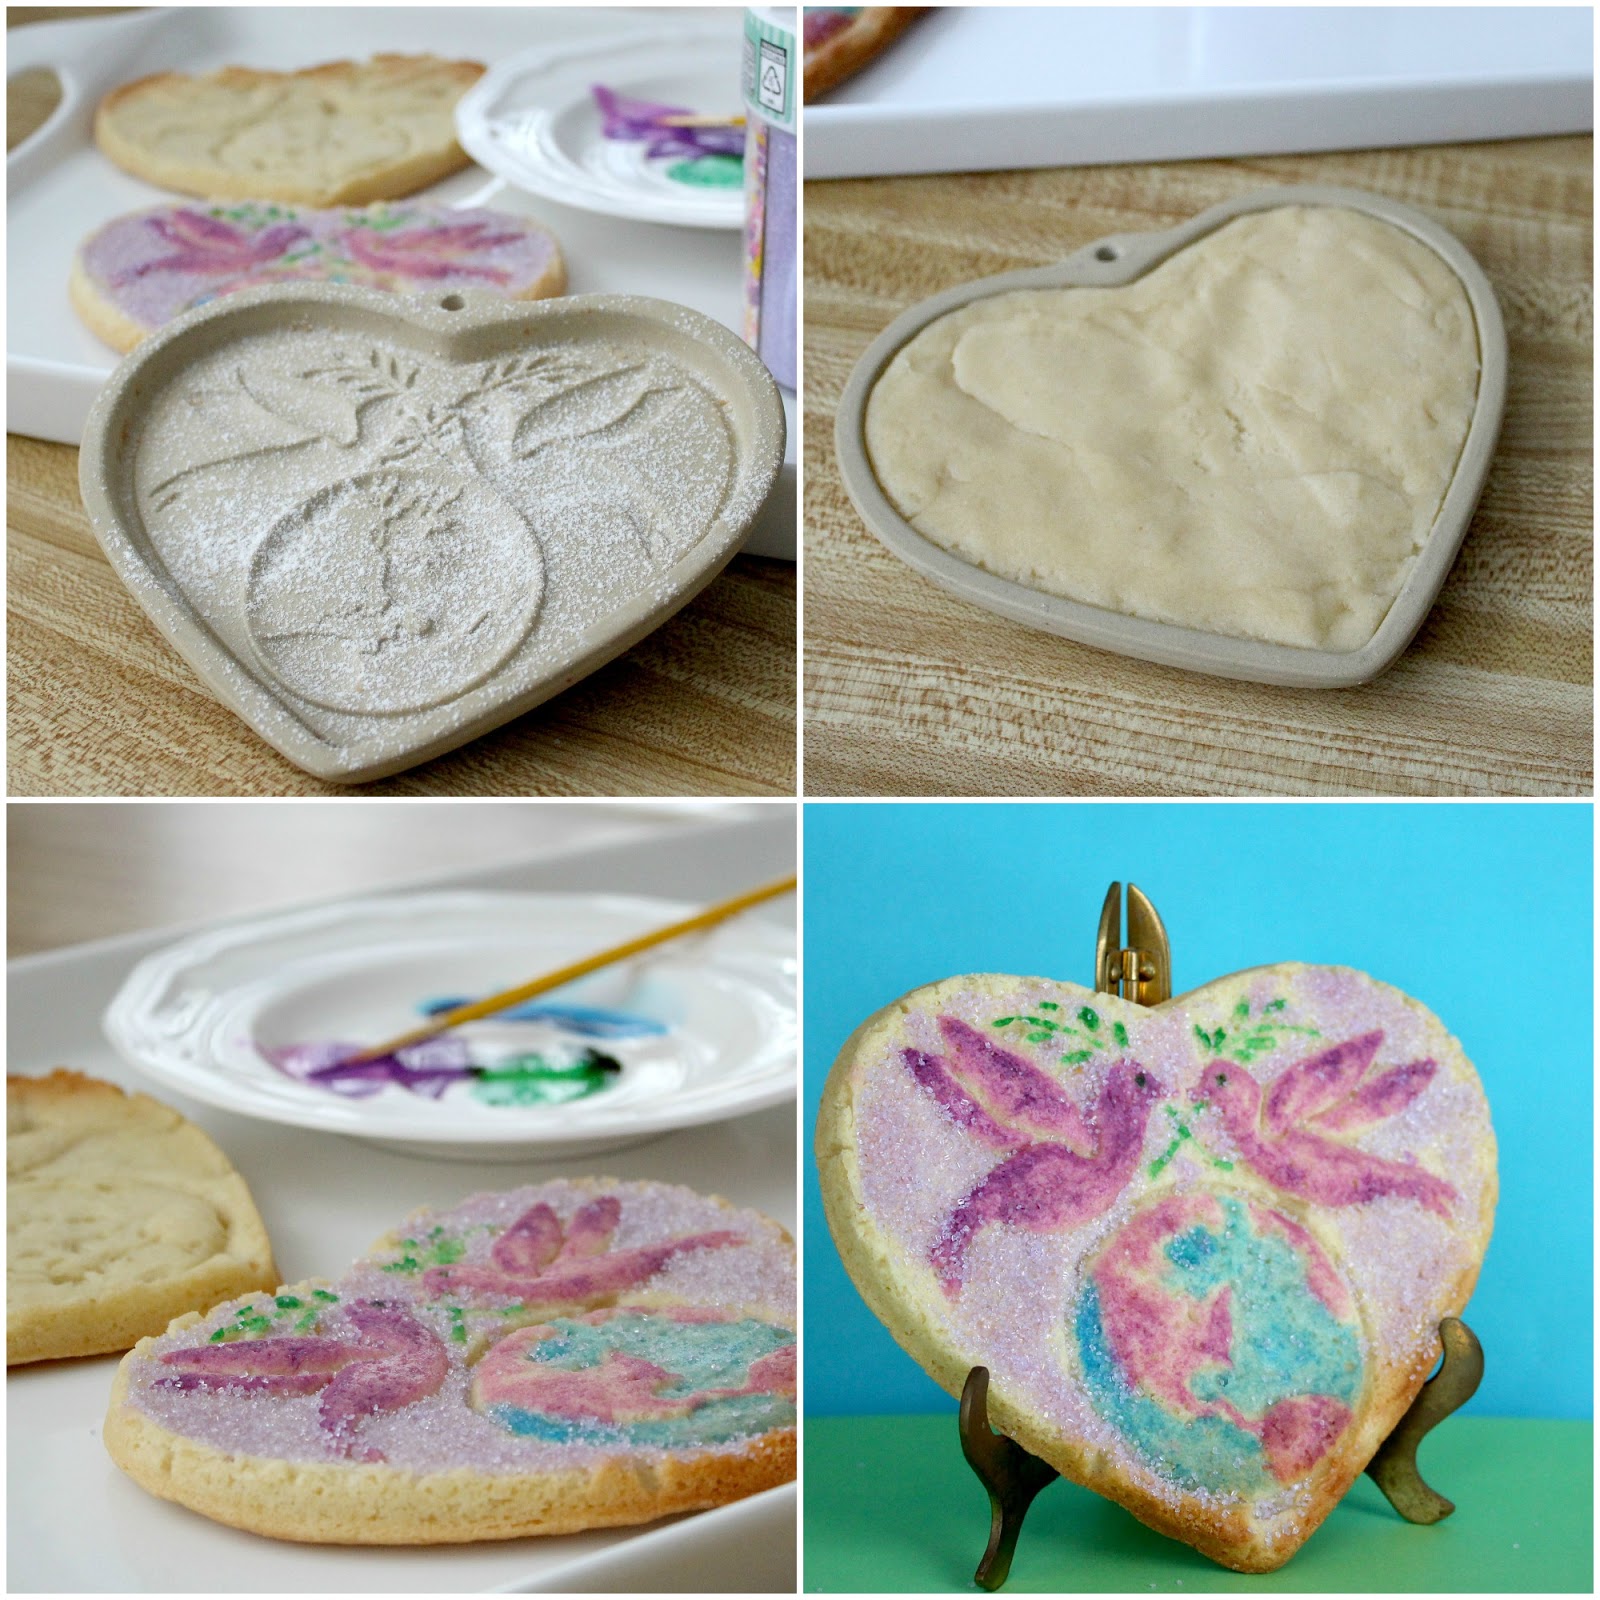
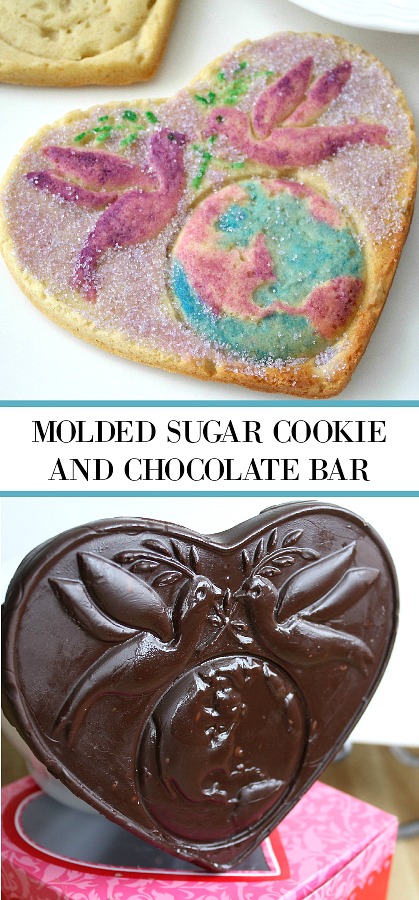
Sugar Cookies for Pampered Chef Heart Shaped Mold

INGREDIENTS:
2   cups all-purpose flour
1/4   teaspoon salt
1/2   cup (1 stick) butter, softened (do not substitute margarine)
3/4   cup sugar
1   egg
1   tablespoon milk
1/4   teaspoon vanilla
 
DIRECTIONS:
In small bowl, combine flour and salt; mix well and set aside. In large bowl, beat butter and sugar until creamy. Add egg, milk and vanilla; beat until smooth. Gradually add flour mixture; beat until well blended.
 
Form dough into a 4-inch disk; wrap in plastic wrap. Refrigerate 1-2 hours.
 
Preheat oven to 375°F. Lightly flour Heart Stoneware Mold; firmly press a portion of the dough into mold.
 
Run knife flat across top of mold to trim off excess dough. (I just patted even with my fingers) Gently pull dough away from edge of mold with finger.
 
To release dough from mold, cover cutting board with a clean folded kitchen towel. Hold mold upright; lightly tap edge on cutting board until dough starts to release. Transfer dough to flat Baking Stone; repeat with remaining dough.
Decorate with tinted egg wash, if desired.
Bake 12-14 minutes or until edges are light brown; cool 3 minutes on baking stone. Remove cookies to cooling rack; cool completely.
Yield: 5-6 cookies
 
NOTE:
I baked the cookie right in the mold and colored them after baking.  I mixed a little milk with a few drops of food coloring and using a new paint brush, added color to the baked and cooled cookie.  To help the sugar sprinkles adhere, I first brushed with a little milk on a small portion of the cookie and quickly sprinkled on the sugar.
 
*next time* I will read the instructions carefully and release the dough onto a baking sheet before proceeding 🙂

Then I made a Tissue Paper Decoration

heart shaped mold tissue paper decoration

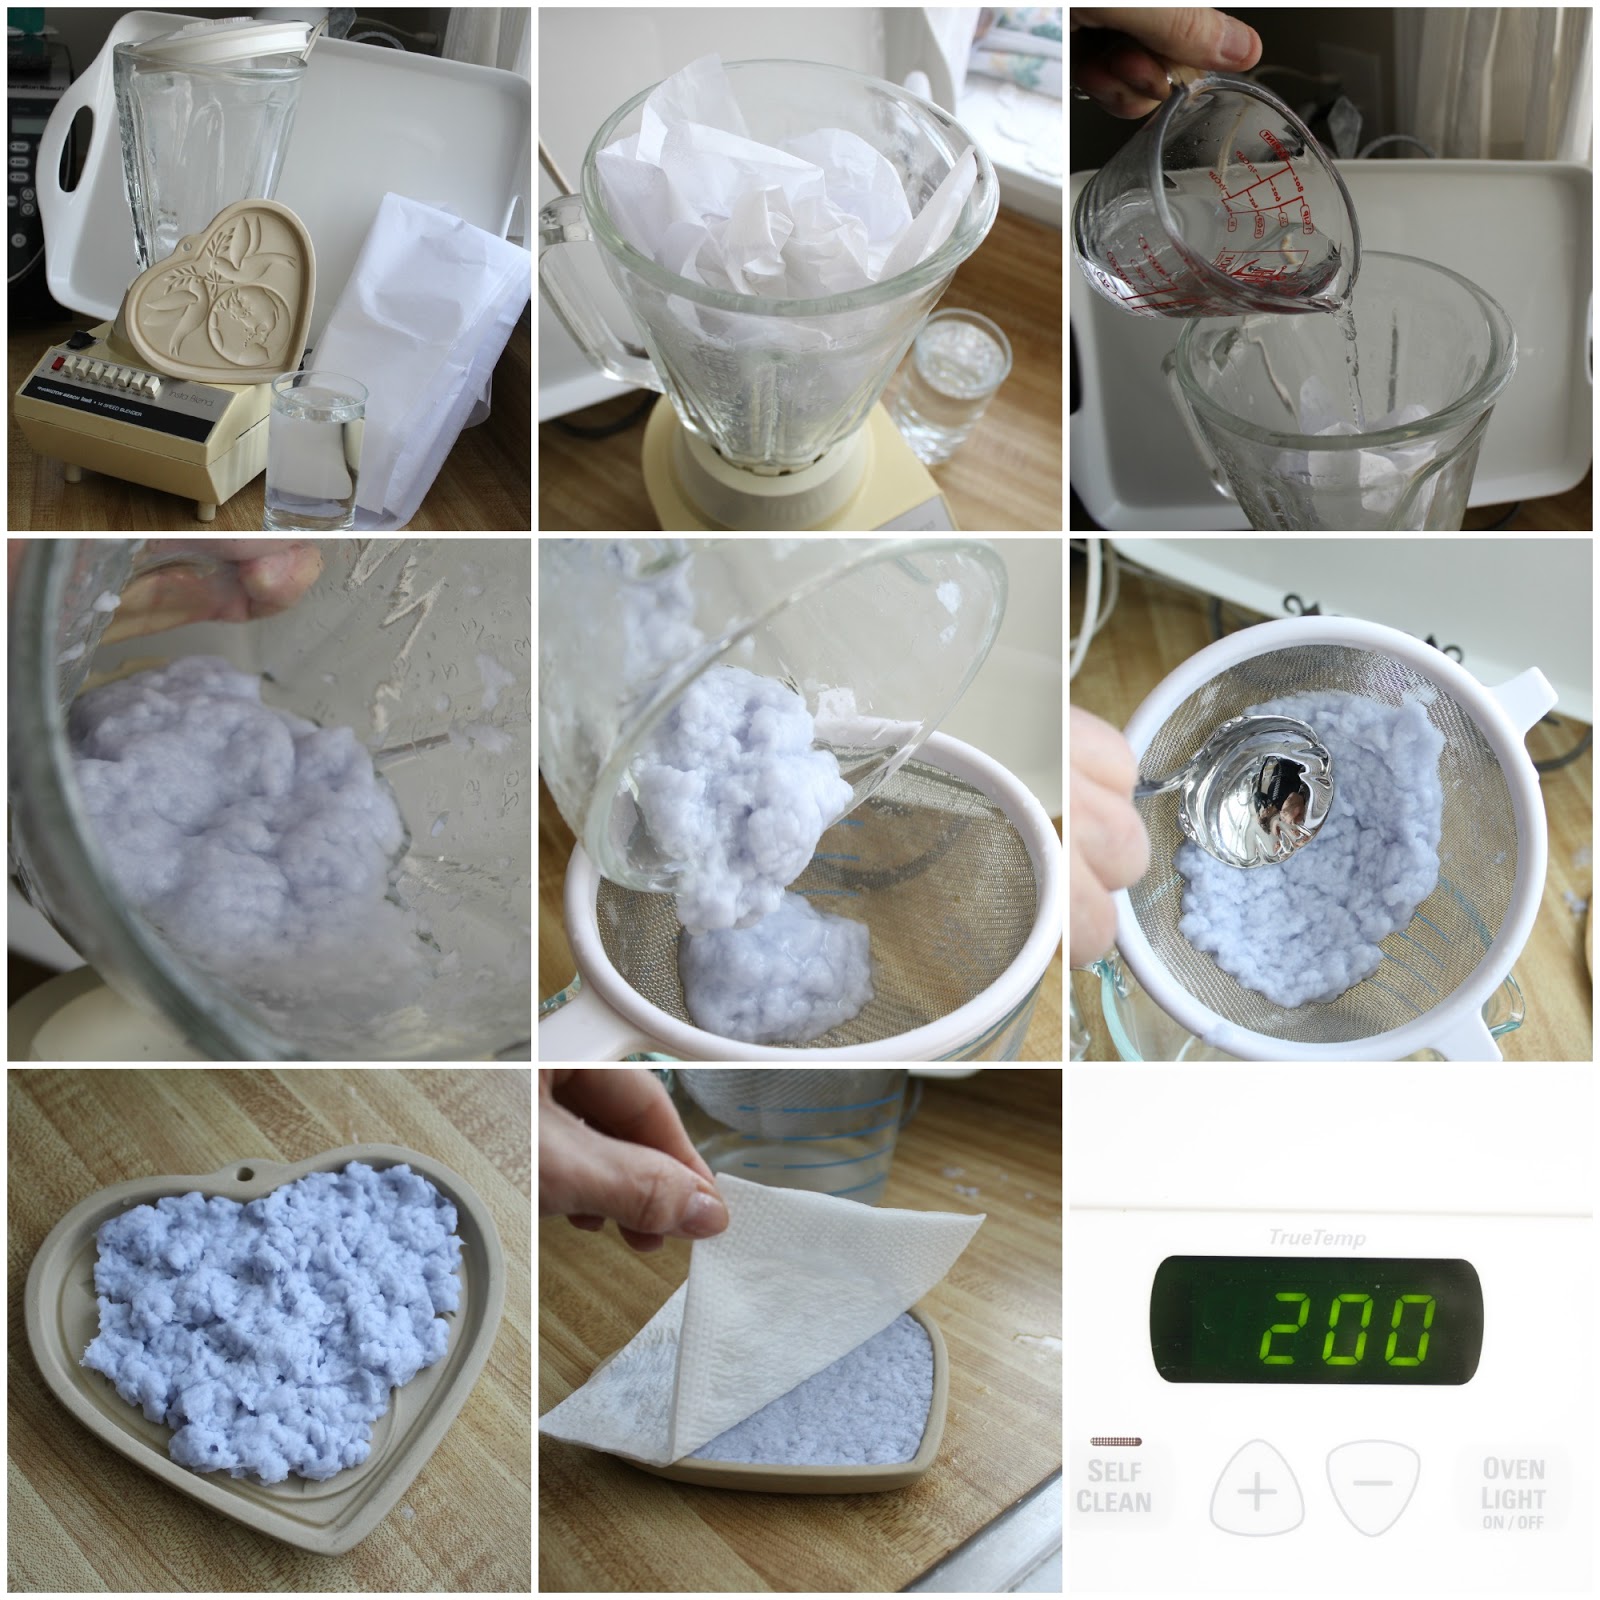
Heart Shaped Mold Tissue Paper Decoration

Ingredients:
2  sheets tissue paper (20 x 26 inches each)
1 1/4  cups water

Directions:
Preheat oven to 200°F. Crumble tissue paper. Place tissue in blender container; carefully push down close to blade. Add water. Cover; blend 15-20 seconds.

Place blended paper in colander; squeeze excess water out with hands or spatula.

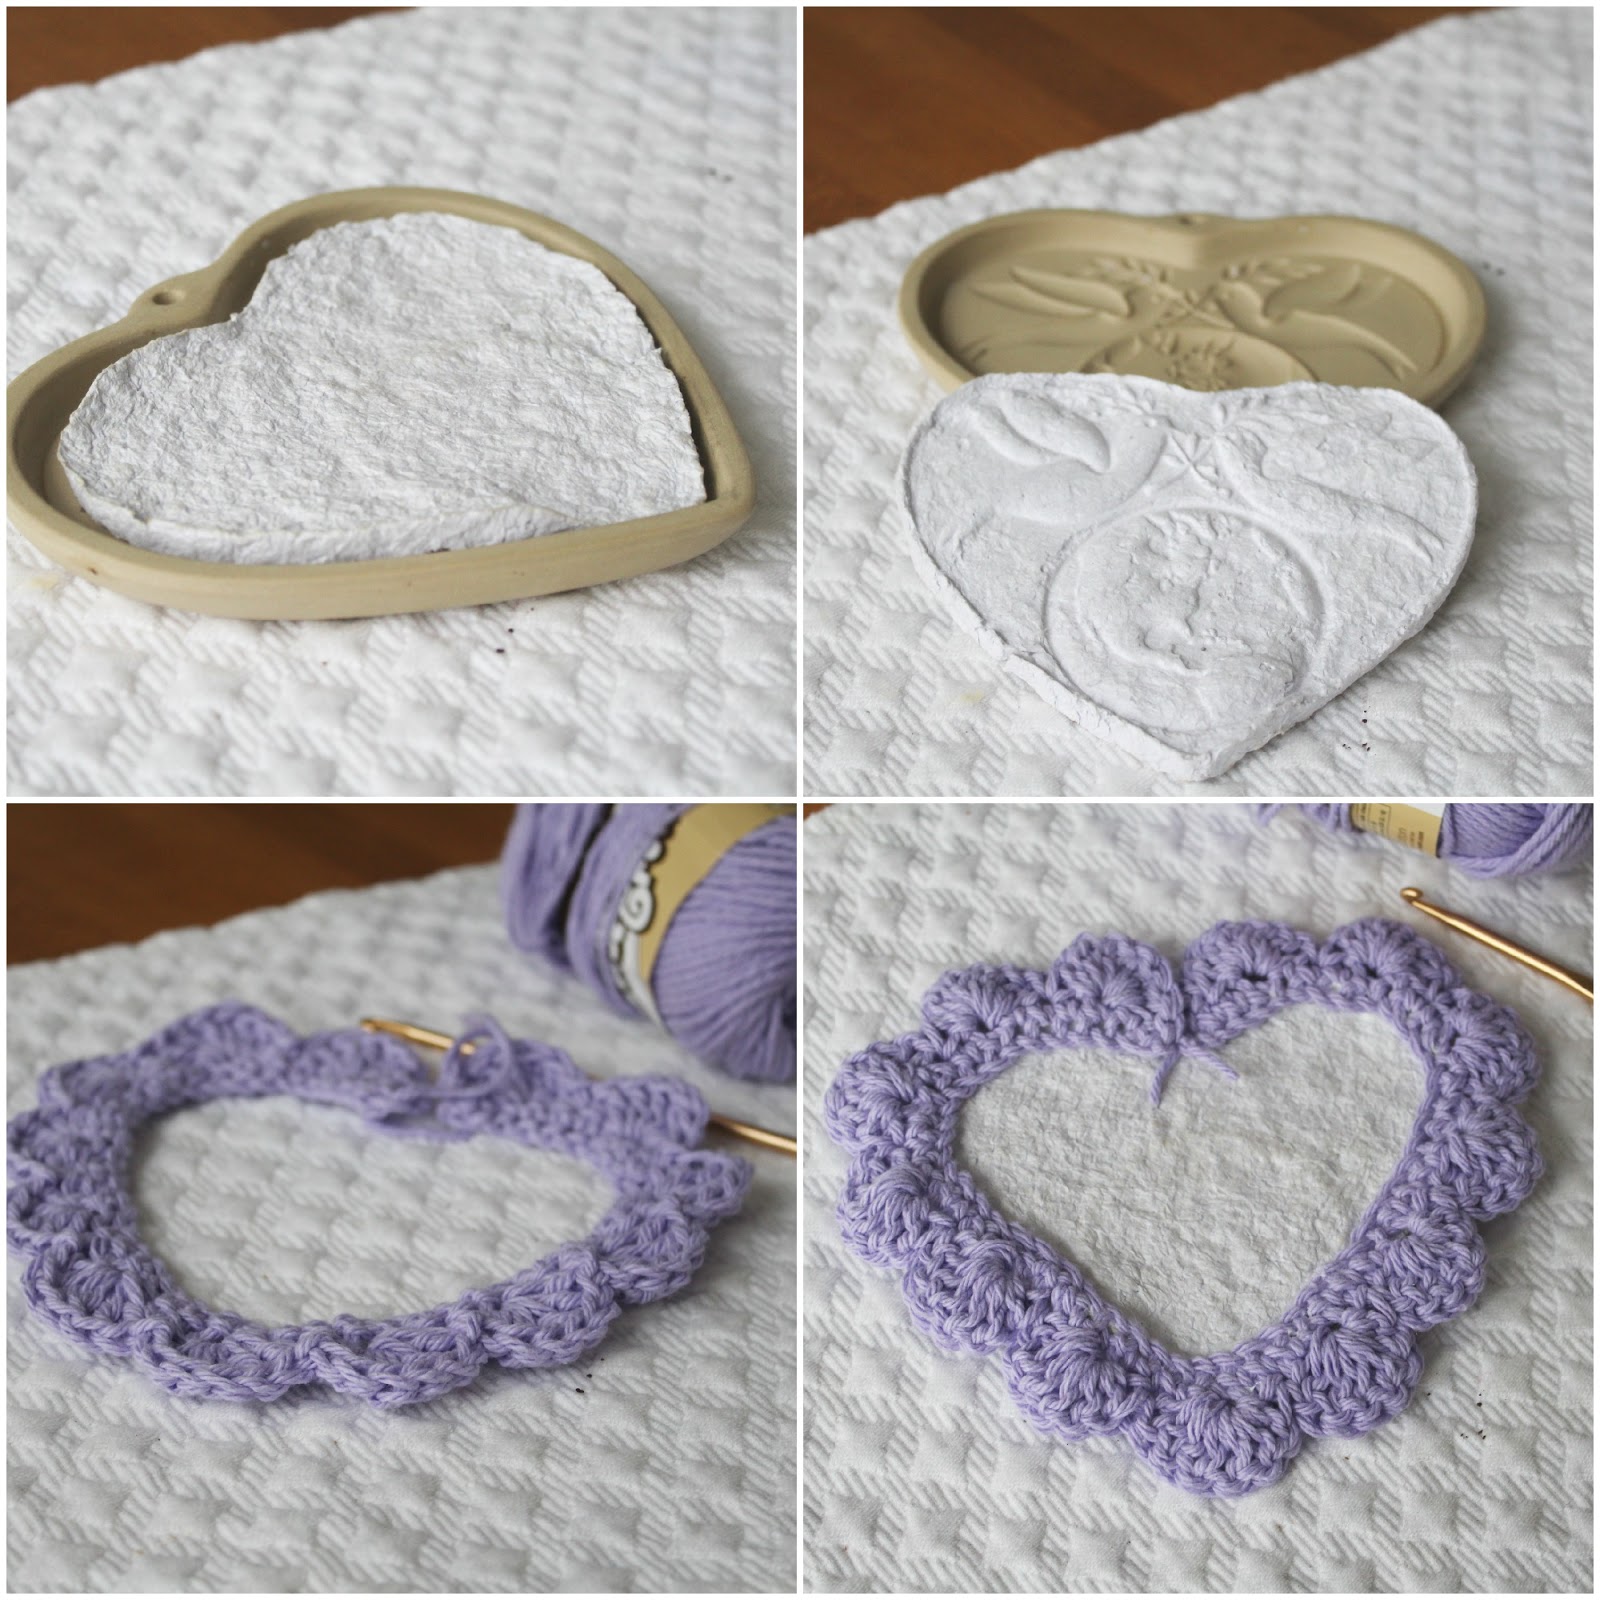
Firmly press paper pulp evenly into Heart Cookie Mold. Blot any excess water from paper in mold using kitchen towel. Bake 2 1/2 to 3 hours or until paper is completely dry. (Do not over bake or edges will curl and turn brown.)

Remove paper decoration from mold; cool completely on cooling rack. If desired, paint with water colors or acrylic paints, or decorate as desired.

Yield: 1 decoration

Cook’s Tips: Paper decoration can be dried at room temperature for several days. Place a flat object over the mold to prevent edges from curling.

heart shaped mold tissue paper decoration
My white tissue paper turned bluish-purple when I added the water.  I liked the soft color and decided not to add paint.  To finish the heart, I crocheted a simple shell edging before mounting it onto vintage looking craft paper.

Heart-shaped mold chocolate heart

Finally, I tried to make a chocolate heart.
heart shaped mold chocolate bar
I thought this would be the easiest project of all. Although, I carefully followed the instructions, no matter how I tried, I could not get the chocolate to release from the mold without breaking. Finally, I lightly sprayed the mold with PAM and spread evenly with my finger leaving as little as possible.  I poured melted chocolate (this time mixed with raisins) into the mold and gently tapped the mold on a folded towel to level.  I popped it into the freezer until frozen.  Fearing it would break as the others did, I was very happy it fell from the mold after just a few, gentle taps.
heart shaped mold chocolate bar
heart shaped mold sugar cookie

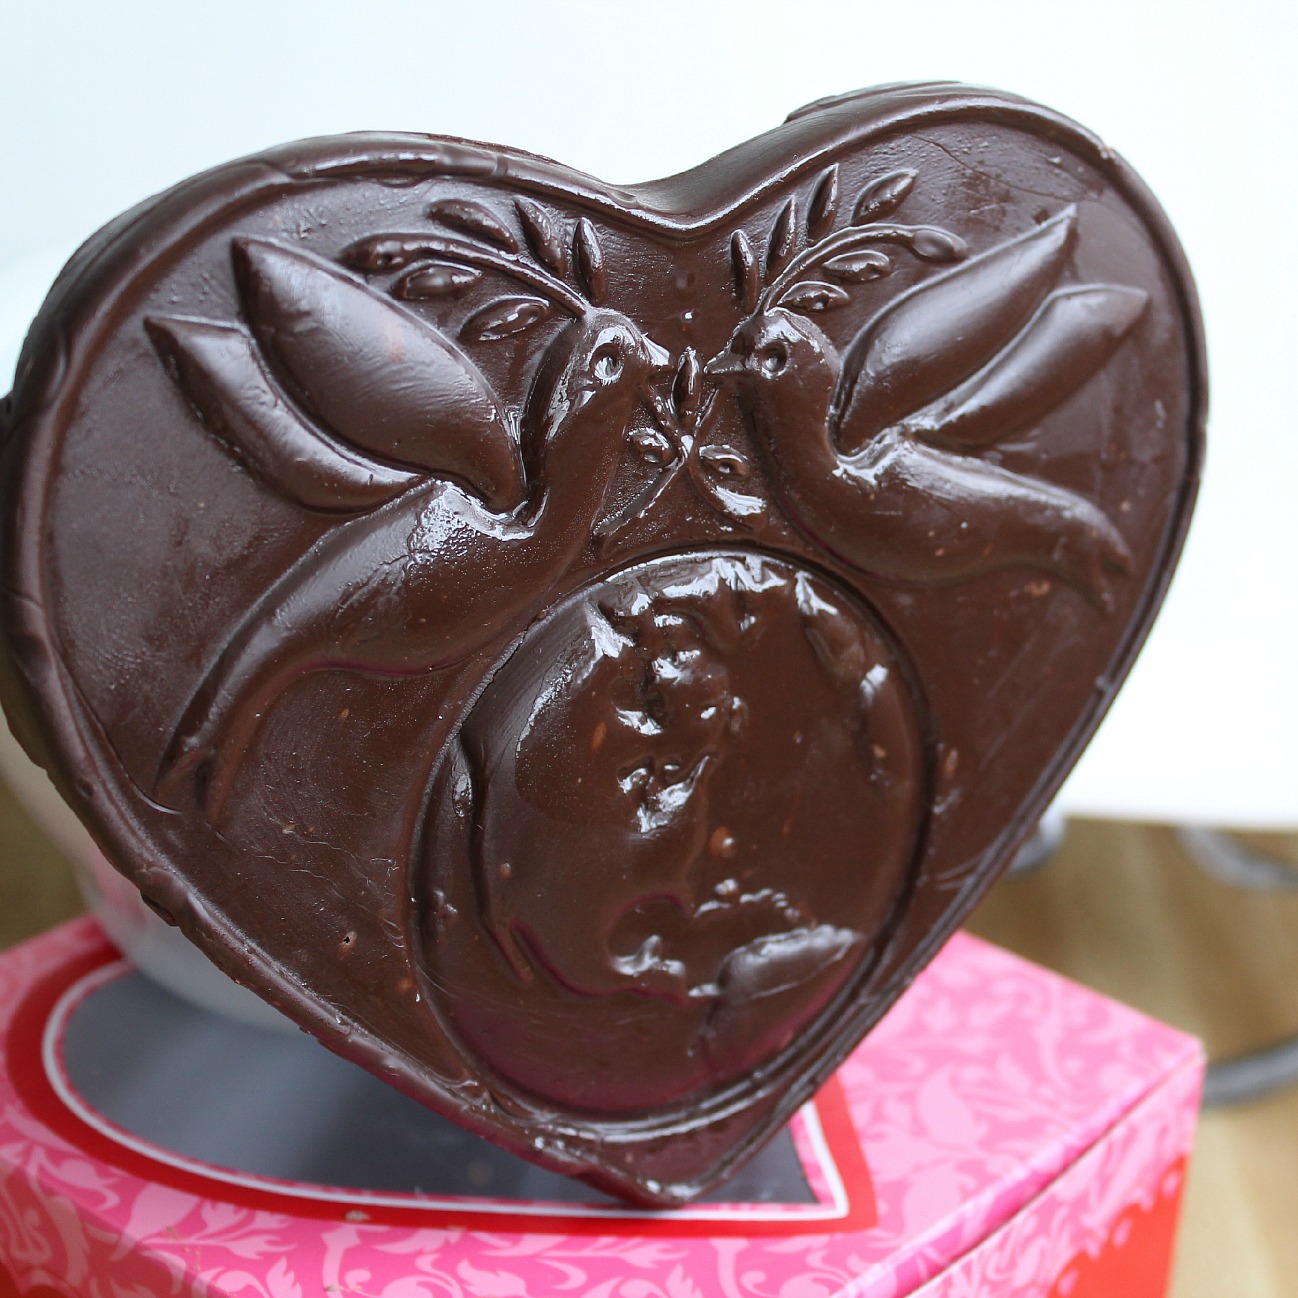
Even though this is a Christmas mold called, “Joy to the world”, I thought it appropriate for Valentine’s Day and this verse immediately came to mind. There really isn’t a greater love than this.

you might also like…

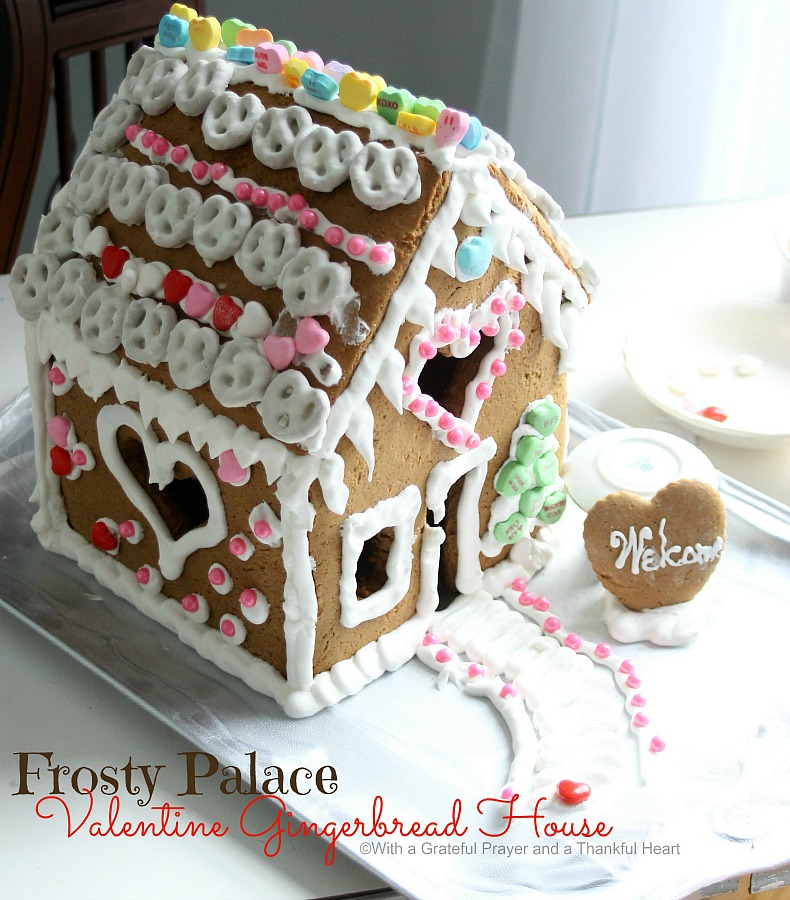
Valentine’s Day Gingerbread House

Super sweet, to make, Valentine's Day Gingerbread House. Decorate with Royal Icing as the glue for favorite candy and treats. Great kids project.

FREE gift for subscribers!

If you enjoyed this post, you’ll love my weekly email. Subscribe to have updates delivered to your inbox and receive FREE gifts available exclusively for subscribers. Don’t miss new content with recipes, crafts and ideas to inspire & encourage you. We would love for you to join our community. Just click the subscribe button below.

Make a sugar cookie, chocolate bar or tissue paper decoration using a Pampered Chef Heart Shaped Mold.


Filed Under: Crafts, More Crafts Tagged With: Bible, Cookies, Crafts, Crochet, Encouragement, Faith, tutorial

Comments

  1. SarahGeorge says

    February 17, 2014 at 5:54 am

    WoW!!! Simply stunning!! Loved the tissue paper project! And the purple heart!! Amazing!

    Reply
  2. kitty says

    February 16, 2014 at 11:07 pm

    I love all the ideas of using the mold, Lorraine. I have a pampered chef mold and used it for shortbread one time. I'll try some of your ideas.

    Reply
  3. Gypsy Heart says

    February 16, 2014 at 2:35 am

    Beautiful! You are so talented.

    xo
    Pat

    Reply
  4. Gypsy Heart says

    February 16, 2014 at 2:35 am

    Beautiful! You are so talented.

    xo
    Pat

    Reply
  5. EMMA says

    February 14, 2014 at 8:55 am

    What beautiful work!
    For some reason I'm not receiving updates from your blog anymore? I wonder where they are going?
    Will definitely be trying your split pea soup this weekend!!

    Reply
  6. Pondside says

    February 14, 2014 at 7:32 am

    They're all great projects, but I have to admit to liking the tissue paper heart best of all!

    Reply
  7. Ann says

    February 14, 2014 at 12:29 am

    What a great trio of projects. Such a neat idea with the tissue paper

    Reply
  8. podso says

    February 13, 2014 at 8:16 pm

    These are wonderful Lorraine. So creative and pretty. good for you to try three things!

    Reply
  9. The Tablescaper says

    February 13, 2014 at 7:29 pm

    This is gorgeous – each one of them! I love how you shared your struggle, rather than making it seem like everything was perfect. Your painting on the cookie is outstanding.

    Hope you'll link this to Seasonal Sundays.

    – Alma, The Tablescaper

    Reply
  10. Blackberry Lane says

    February 13, 2014 at 7:28 pm

    Absolutely gorgeous!

    Reply
  11. Tammy@Simple Southern Happiness says

    February 13, 2014 at 5:32 pm

    your talent knows no bounds. You are now a cookie artist… I am blown away and left with my mouth open shaking my head. How on eart could anyone eat that work of art?
    Bravo!!!

    Reply
  12. Sandy says

    February 13, 2014 at 4:42 pm

    Absolutely beautiful, all of them! The first is my favorite but it is just too pretty to eat.
    Happy Valentine's Day!

    Reply
  13. Suzanne says

    February 13, 2014 at 3:30 pm

    Pretty, pretty projects Lorraine!

    Reply

Leave a Reply Cancel reply

Your email address will not be published. Required fields are marked *

This site uses Akismet to reduce spam. Learn how your comment data is processed.

Hi! I'm Lorraine. Welcome to Grateful Prayer Thankful Heart. A place to find food for your tummy, projects for your hands, and encouragement for your heart.

Theme by 17th Avenue · Powered by WordPress & Genesis