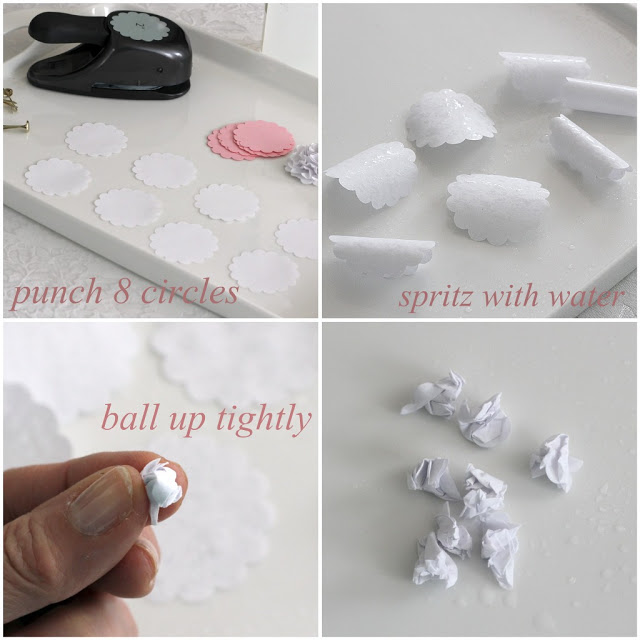
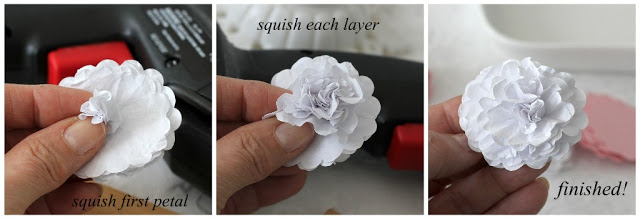
After cutting out 8 circles, lightly spritz with water. Scrunch each circle into a small ball.
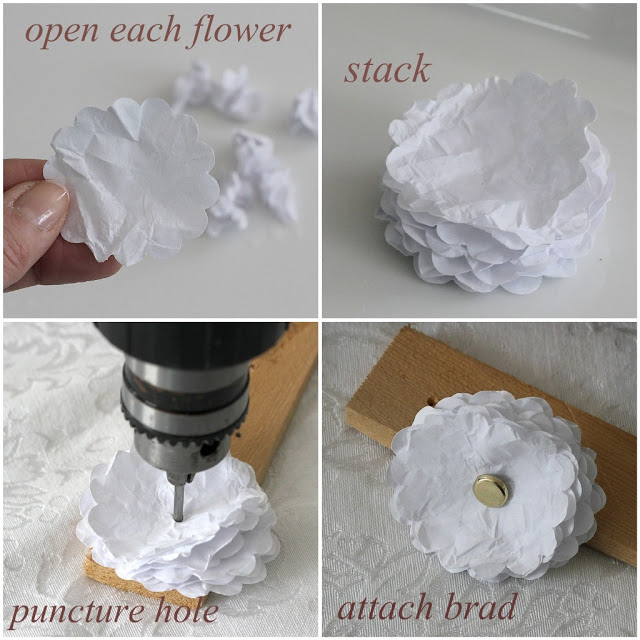
To form the flower, begin with the top petal and squish it together. Repeat with the remaining petals. Then open gently until you like the shape of your flower.
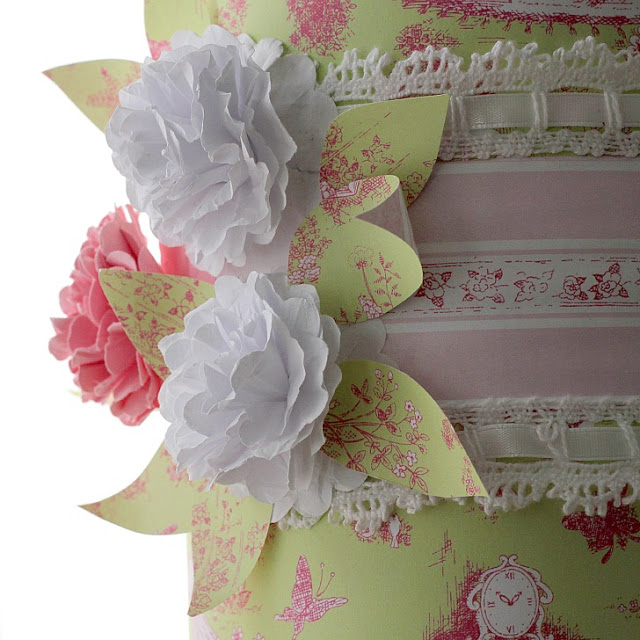
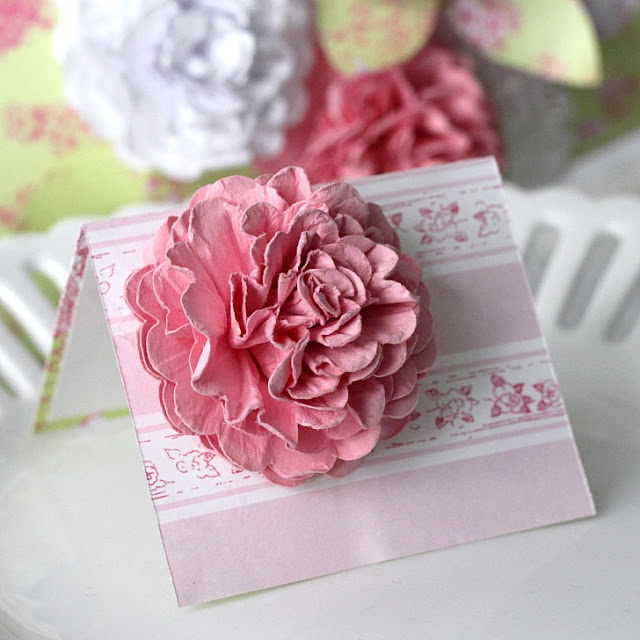
I made my flowers from computer paper and card stock. You might choose paper in solid or a printed pattern. For an added dimension, the edges can be inked just after punching them out and prior to scrunching.
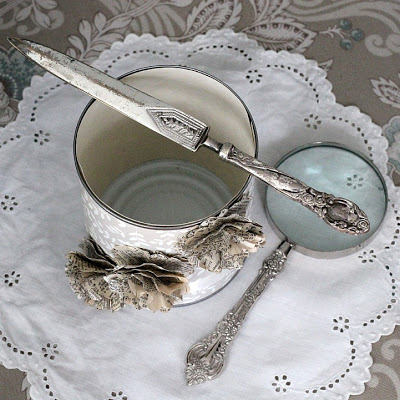
Note about using pages from a book: I found that when making these flowers using pages from an older dictionary that they came out better when I did not wet them. Perhaps there is a greater fabric content but they simply did not hold the scrunch when wet! Pages from a regular book may not react this way but if you find they do, skip the wetting step.


Amazing what one can do with paper!! Looks really great!
That came out so pretty! Thanks so much for adding this to the One Pretty Thing Flickr pool, I'll be linking.
This is my first visit here and I am so loving it. Marie at Spun By Me told me about your blog. I am so glad she did. Your paper flowers are wonderful. I am definitely going to give making them a try.
What a nice idea! 🙂 Petra
Okay… running out the door to find a petal punch! Great tutorial! Cute cute cute! The sky is the limit with this craft :)Michelle
Wow! These are beautiful…I thought you bought them when I first saw the photos! Didn't know it was makable at home. I'll be keeping an eye out for those punchers! I really like the pink flower you have attached to the card.
Wow, very cute!
I just love how you can make an oatmeal container and a tin can look so pretty with a little paper. I don't have a punch like that but I can cut out that same shape with my cricut. I think I see another project being added to my list. Yours turned out beautiful. You've inspired me once again 🙂
Very nice flowers! I will want to be trying these soon! Thanks for the beautiful idea!
Lorraine, I love these…they are so sweet and wonderful. Thank you so much for sharing and explaining the process…I am off to try making some of the flowers for a card I am in the process of creating!
Lorraine, this is so beautiful. The little flowers are so lovely. I would like try this project too.
Yay! for tutorials NOT on video! Thanks so much for this fun idea! I can hardly wait to get a punch to try this out.
All of your projects turned out fabulous! Love, love, love them!
Blessings!
Oh thankyou for the tutorial those are absolutely adorable!!! They would look cute on a little clip and you could put them in your hair ;)my daughter Anna would love that!! I will be trying this out later for sure ~Thanks Love Heather
Those paper flowers are absolutely gorgeous…I am definitely going to try that~
I'm a new follower…I was on Valarie's site and felt compelled to hop over and check you out; I liked the title so here I am 🙂
Such a lovely idea! Beautiful! 😀 Thank you!
So pretty Lorraine. I'm thinking of all kinds of places where I need a sweet little touch.
These are so pretty! Love your new desk accessory. What a perfect use for a tin can.
I'm looking forward to giving these a try.
These are beautiful. My daughters and I have done the felt flowers before, but these are less expensive and perhaps even more versatile.
Thanks for sharing.
I love the picture of you and your grandchildren.
LOVVVVE it~ I have bookmarked this page for something to do with the little girls! GREAT idea! xxoo Diana
Your flowers are lovely and I especially like the note paper. What a great idea.
So cute. I love making paper flowers and you've given me some new ideas on where to use them. Thanks for the tutorial.
Truely amazing and beautiful! Thanks for the tutorial!!!
I want to make some of those flowers right now…just darling!